

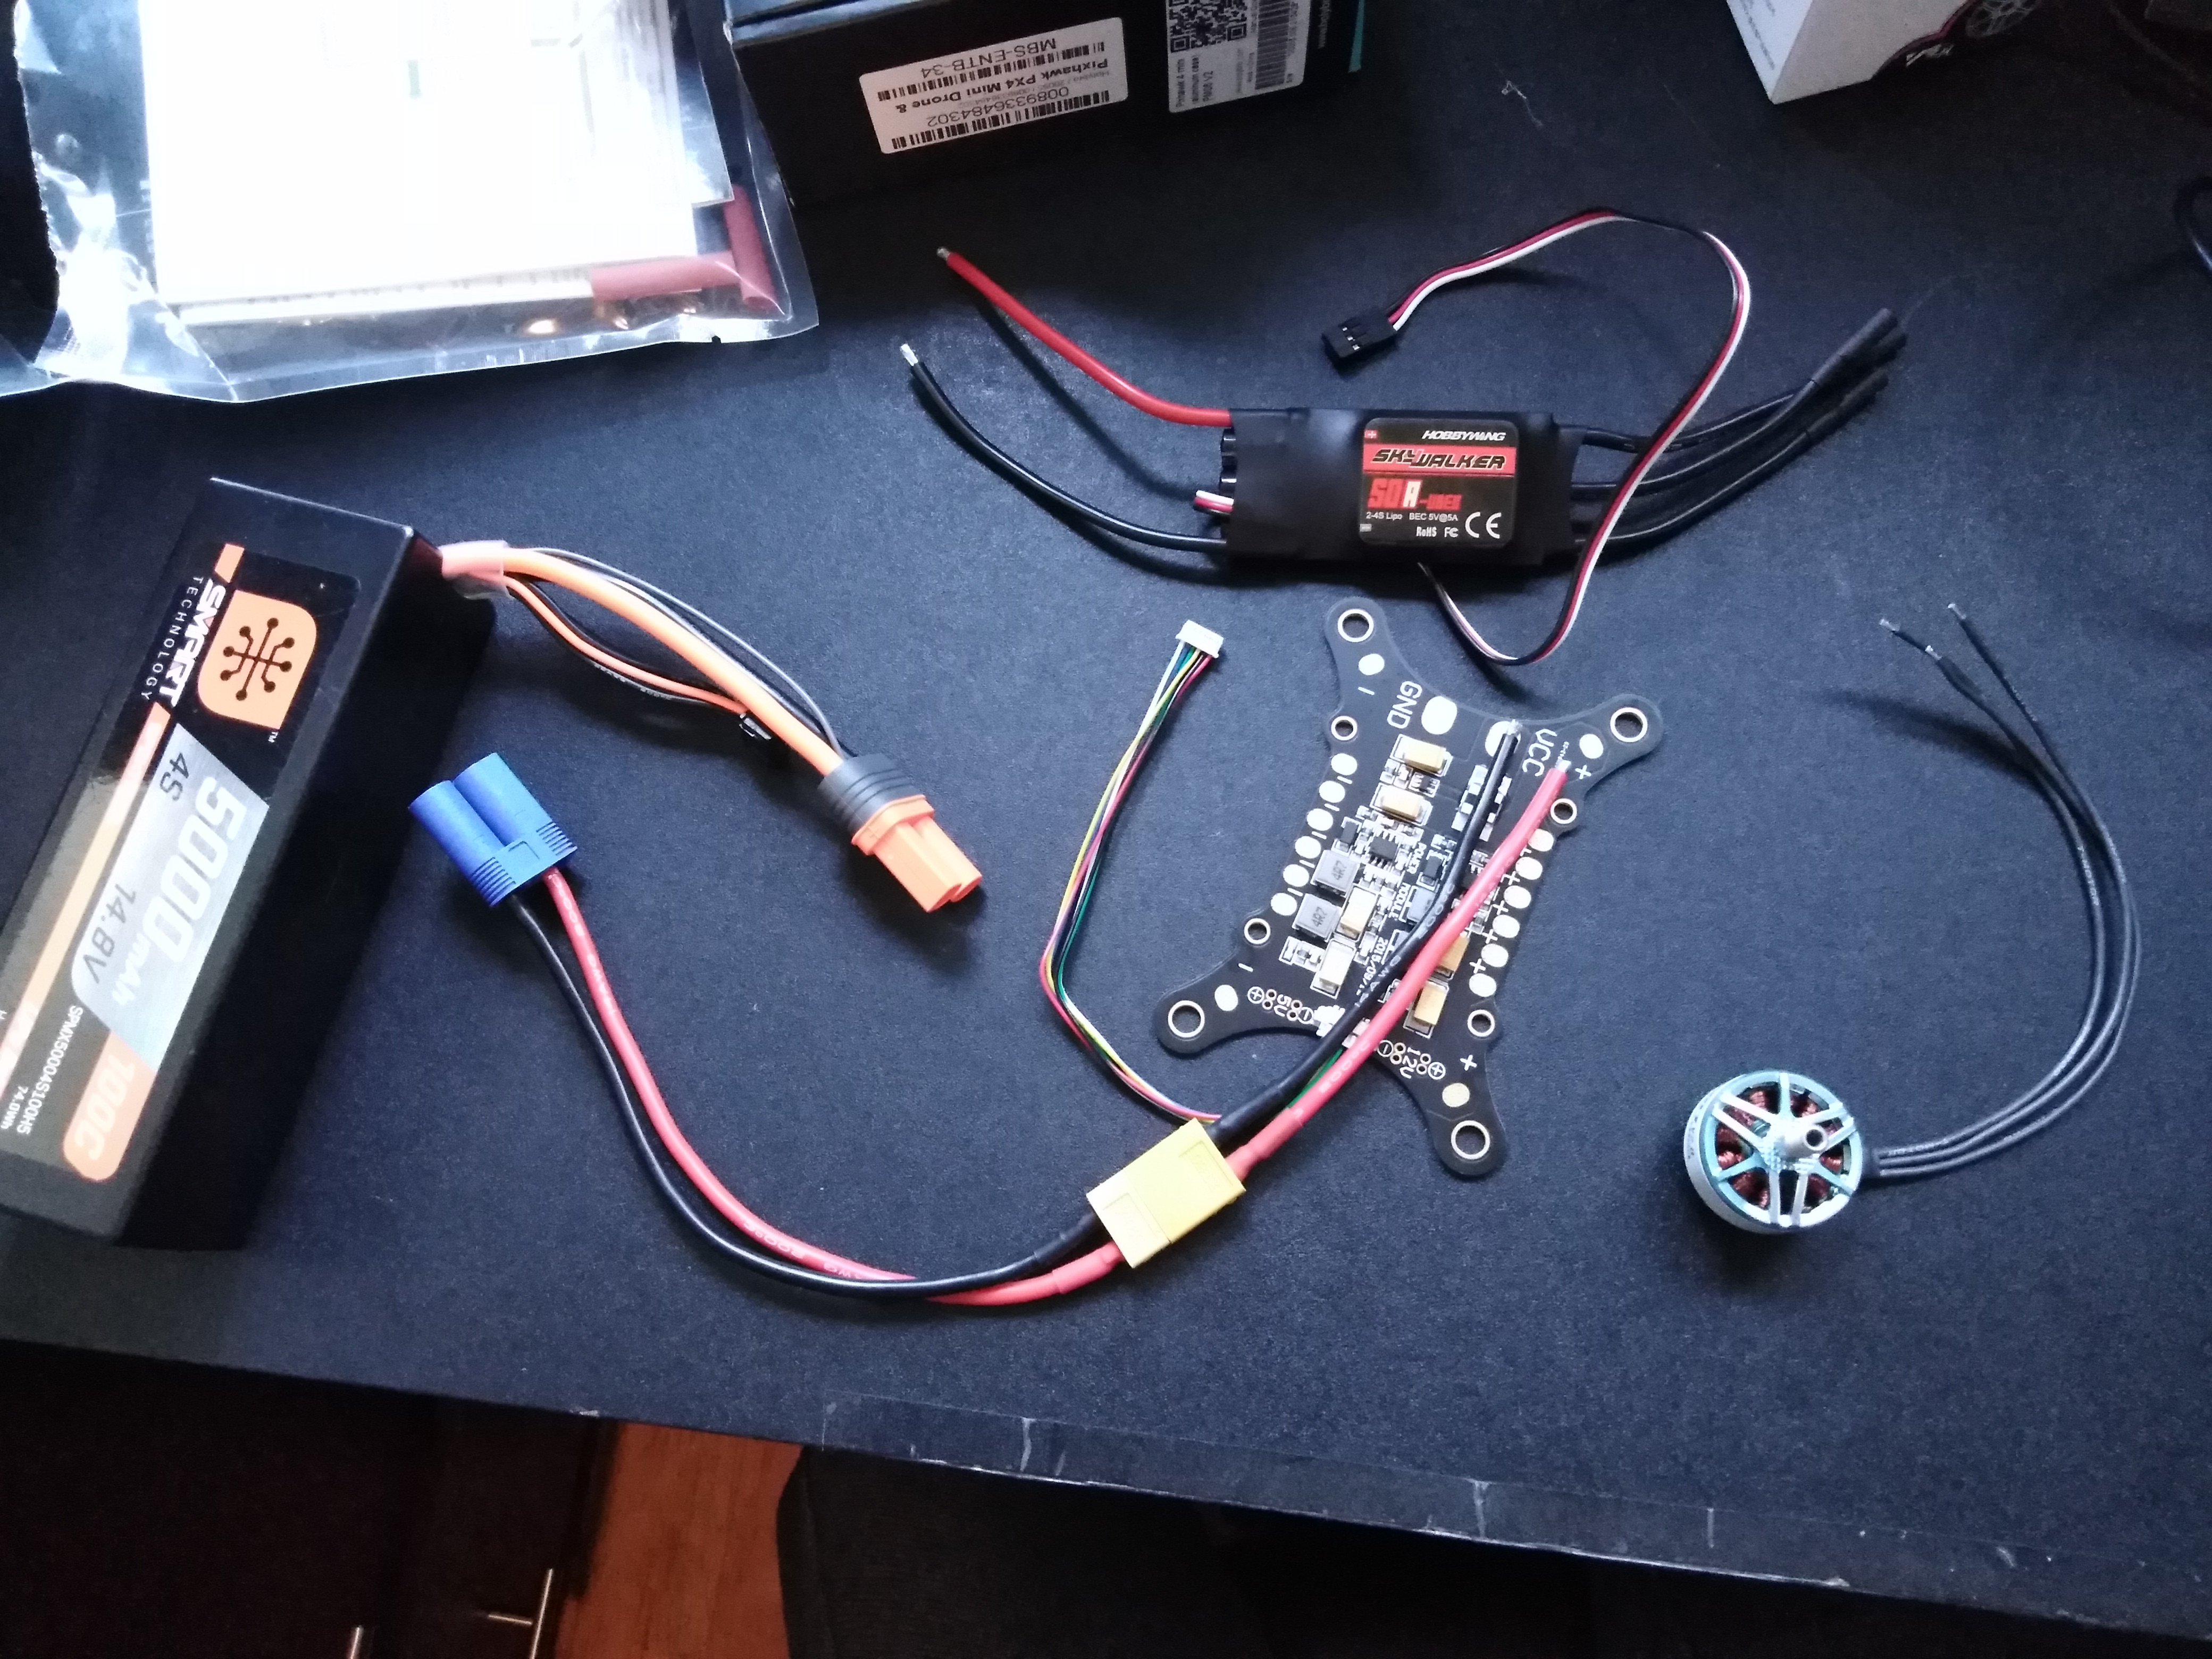
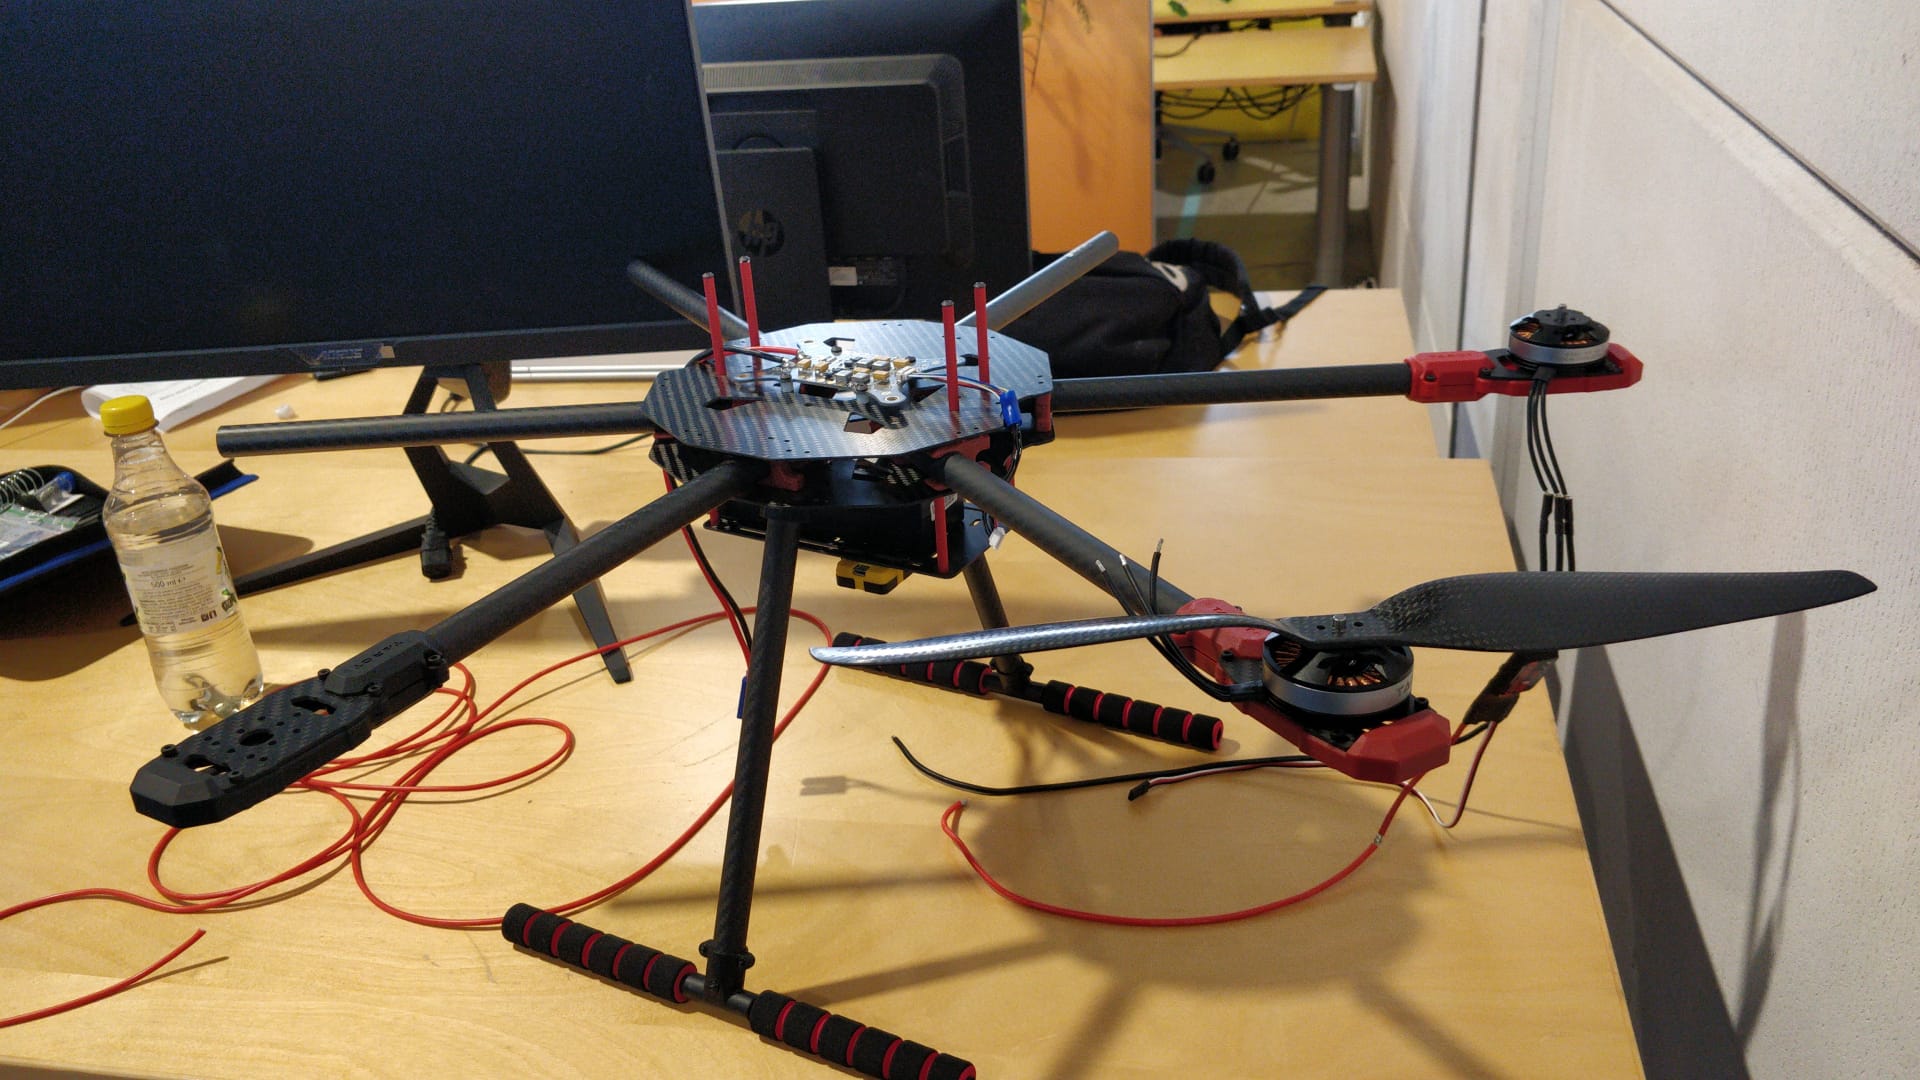
Alle onderdelen (ESC, pixhawk, motor, PDB):
How to connect Quadcopter Motors and ESC. Van deze website: Another tip is to try and make sure the motor wire order going to each of your ESC is consistent. So the first wire from your motor goes to the first connection on your ESC, and the middle wire from your motor goes to the middle tab on your ESC. Doing this makes configuring your quadcopter much easier later on. If you connect it wrong its not a big deal as the motor will just spin the wrong way around and you need to change a setting to reverse it via your ESC configuration software.
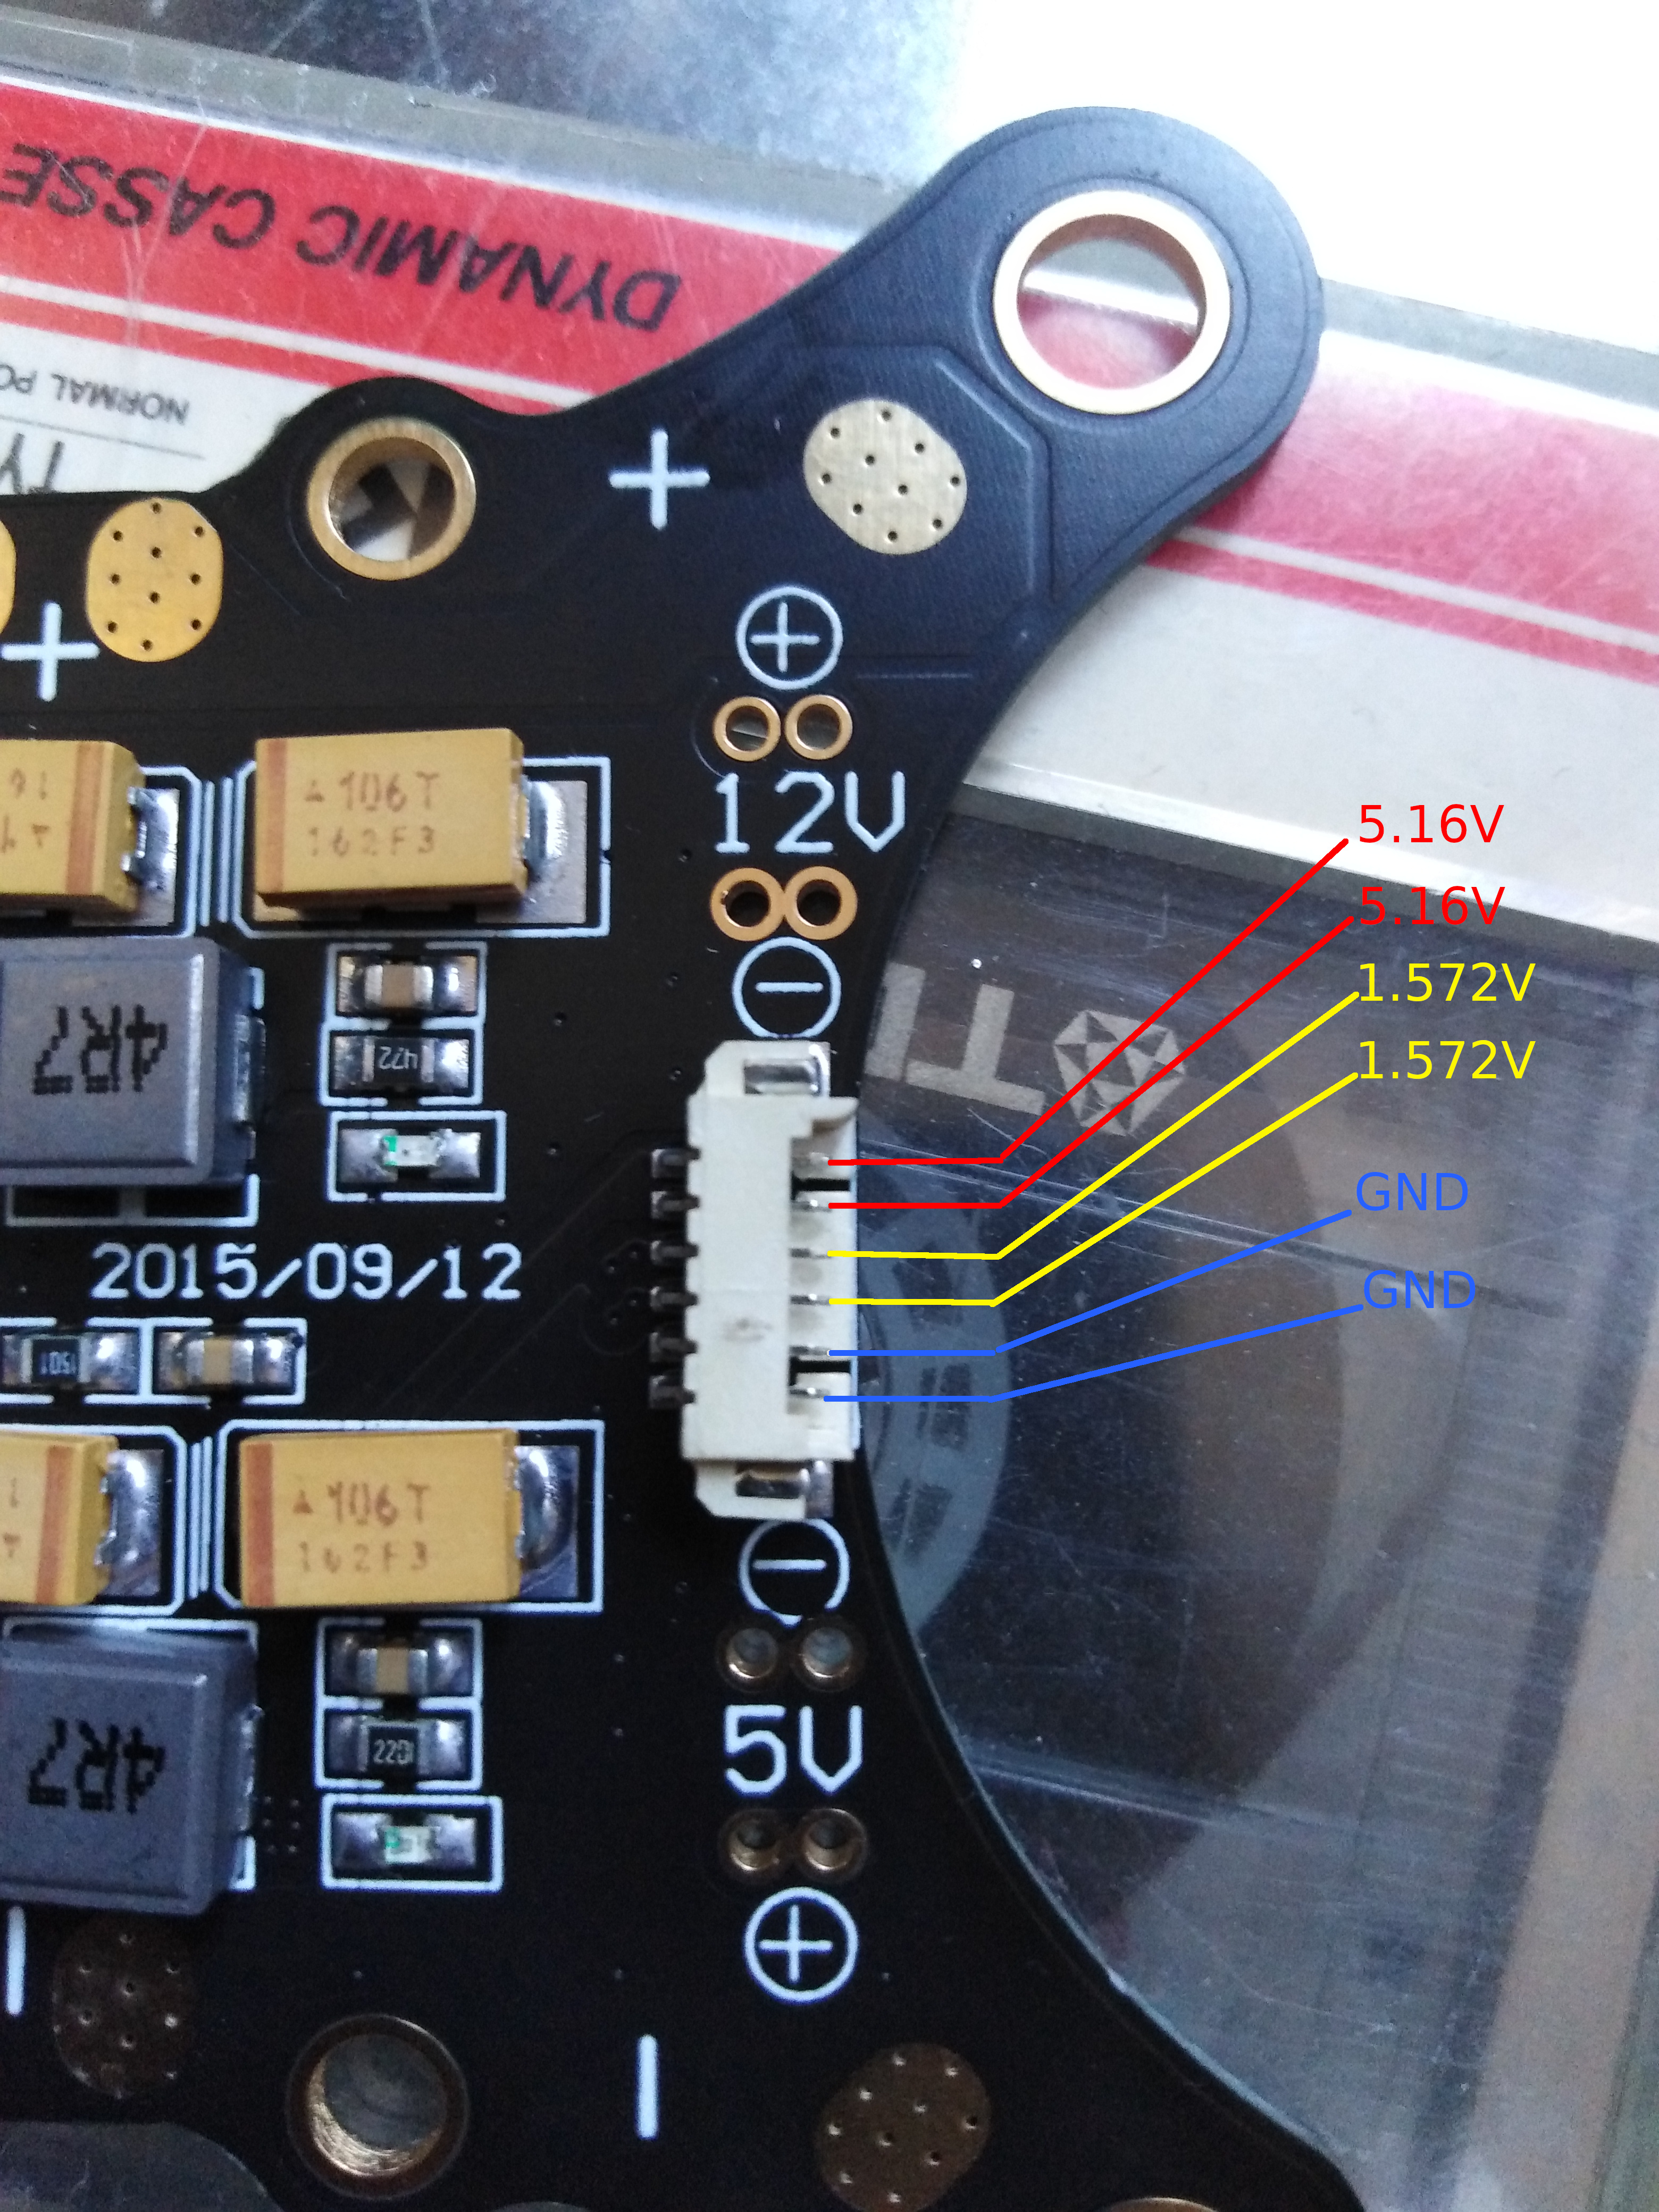
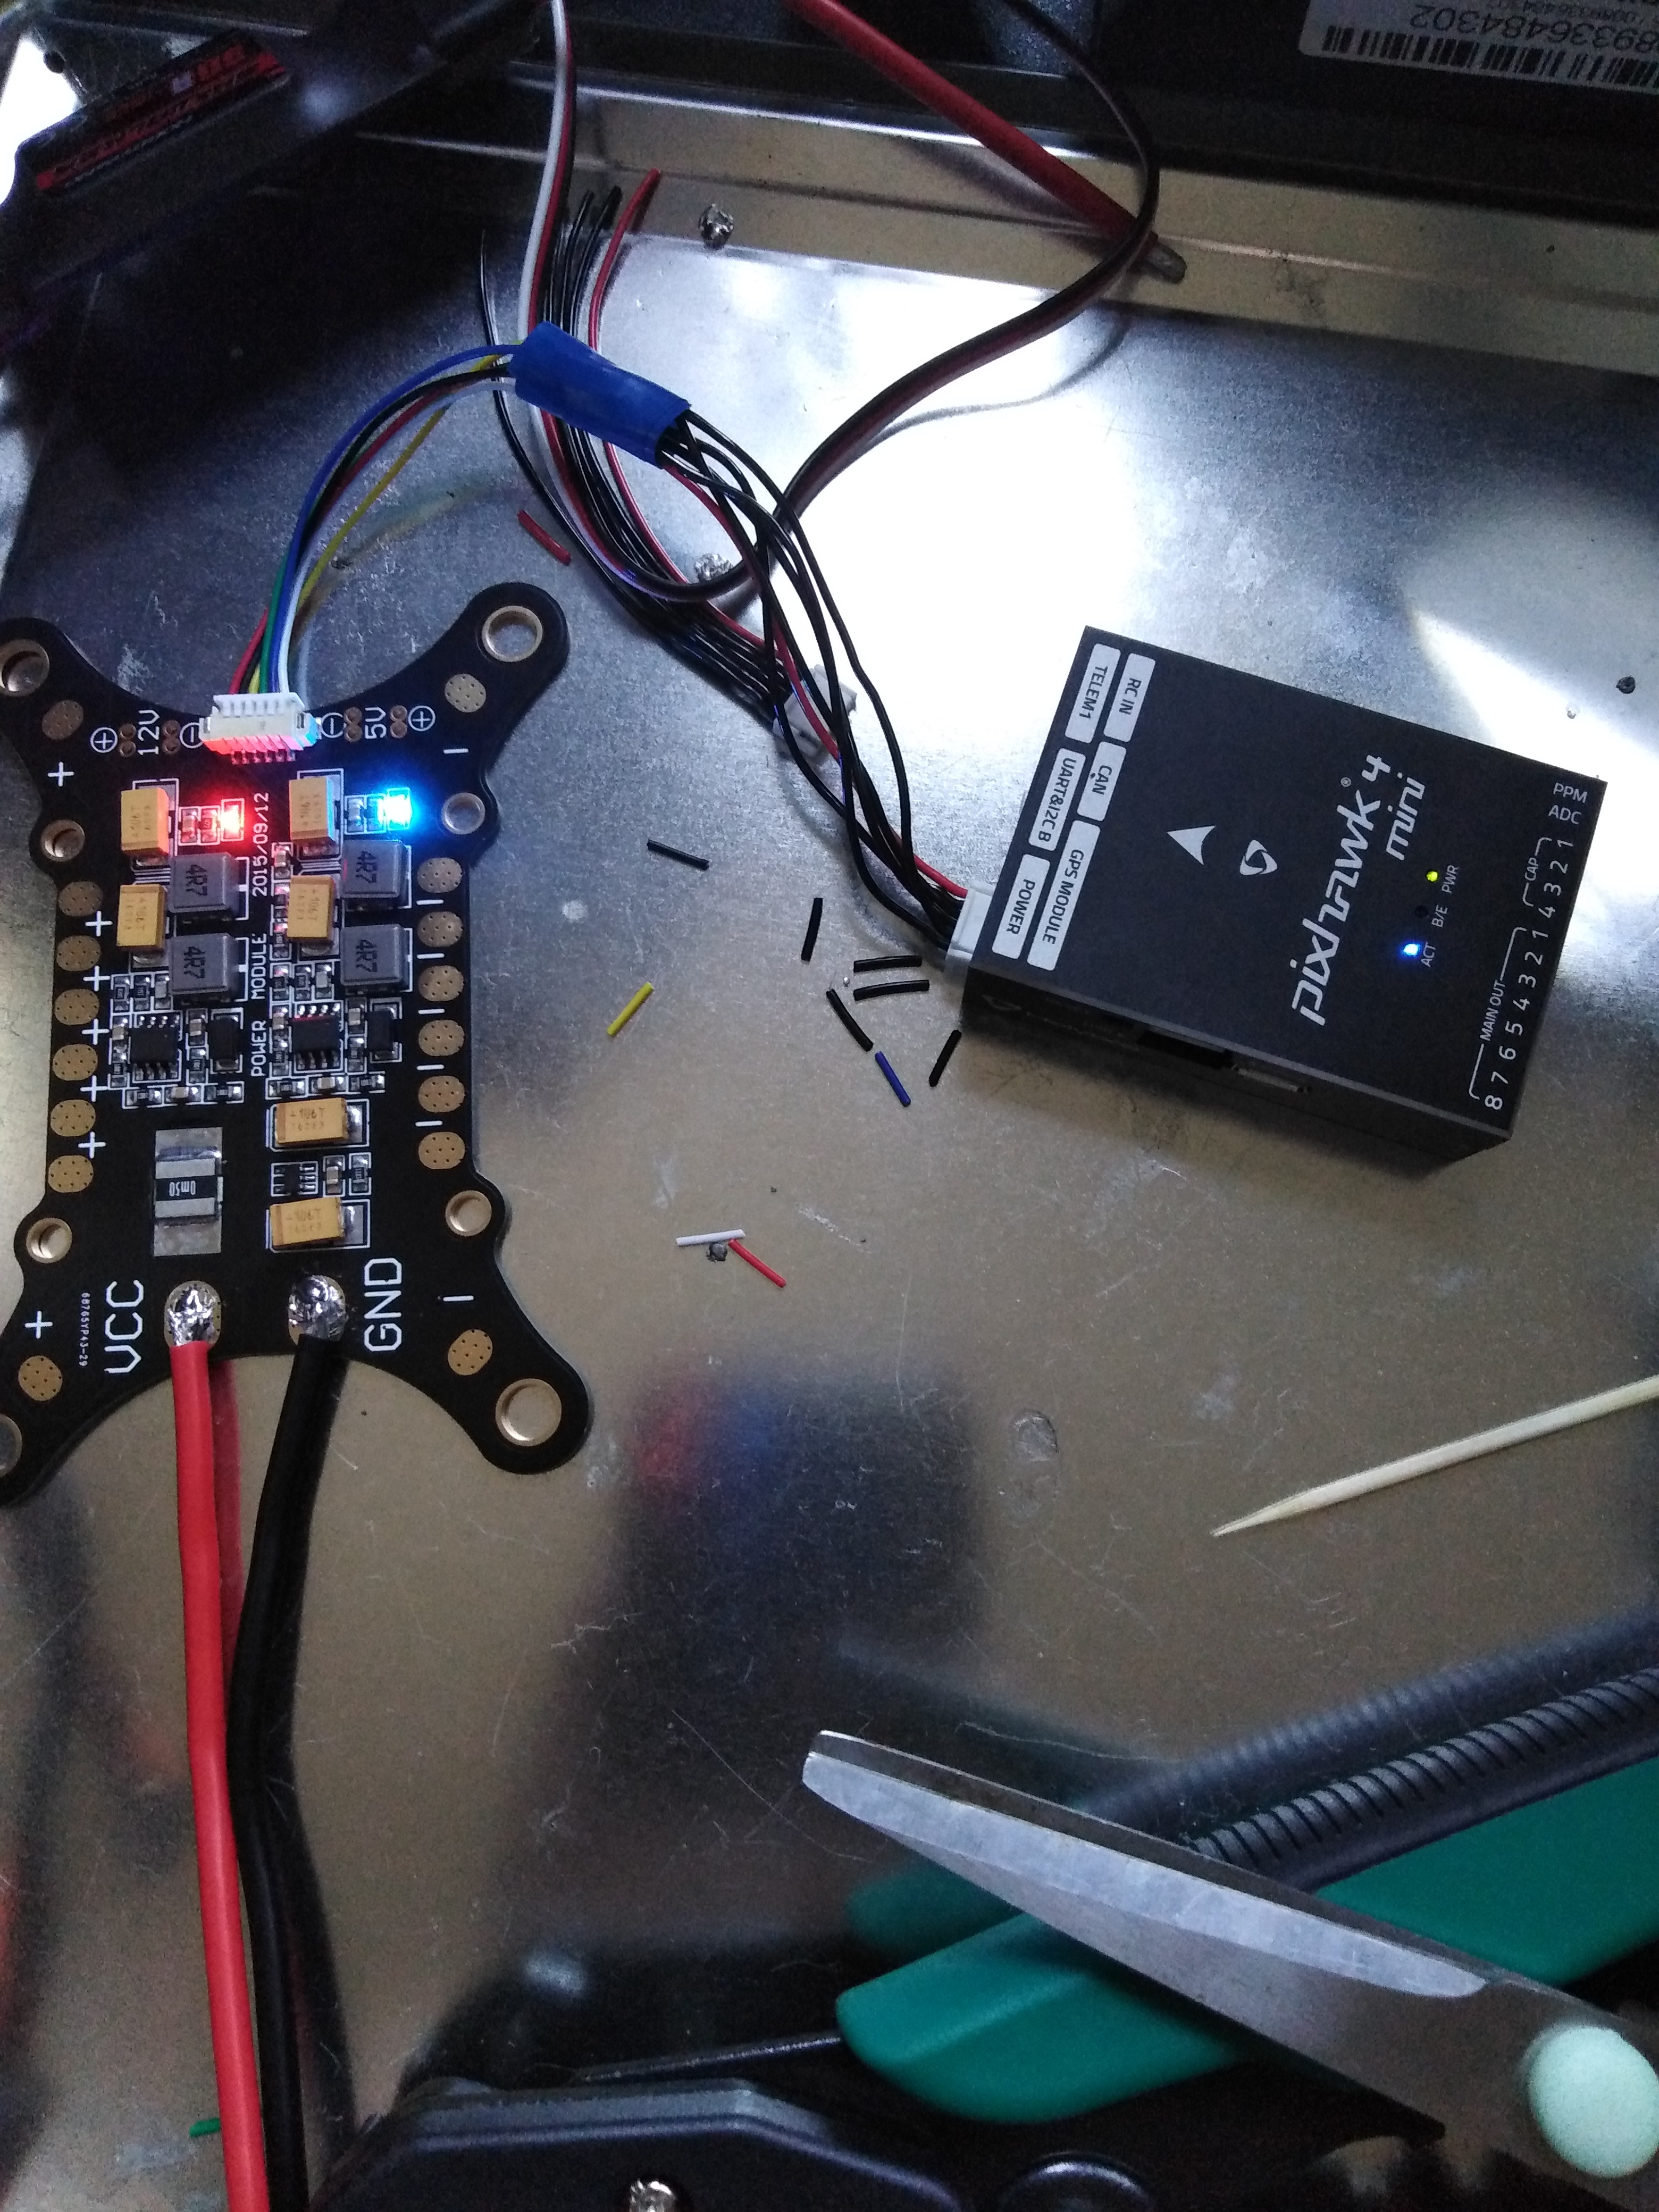
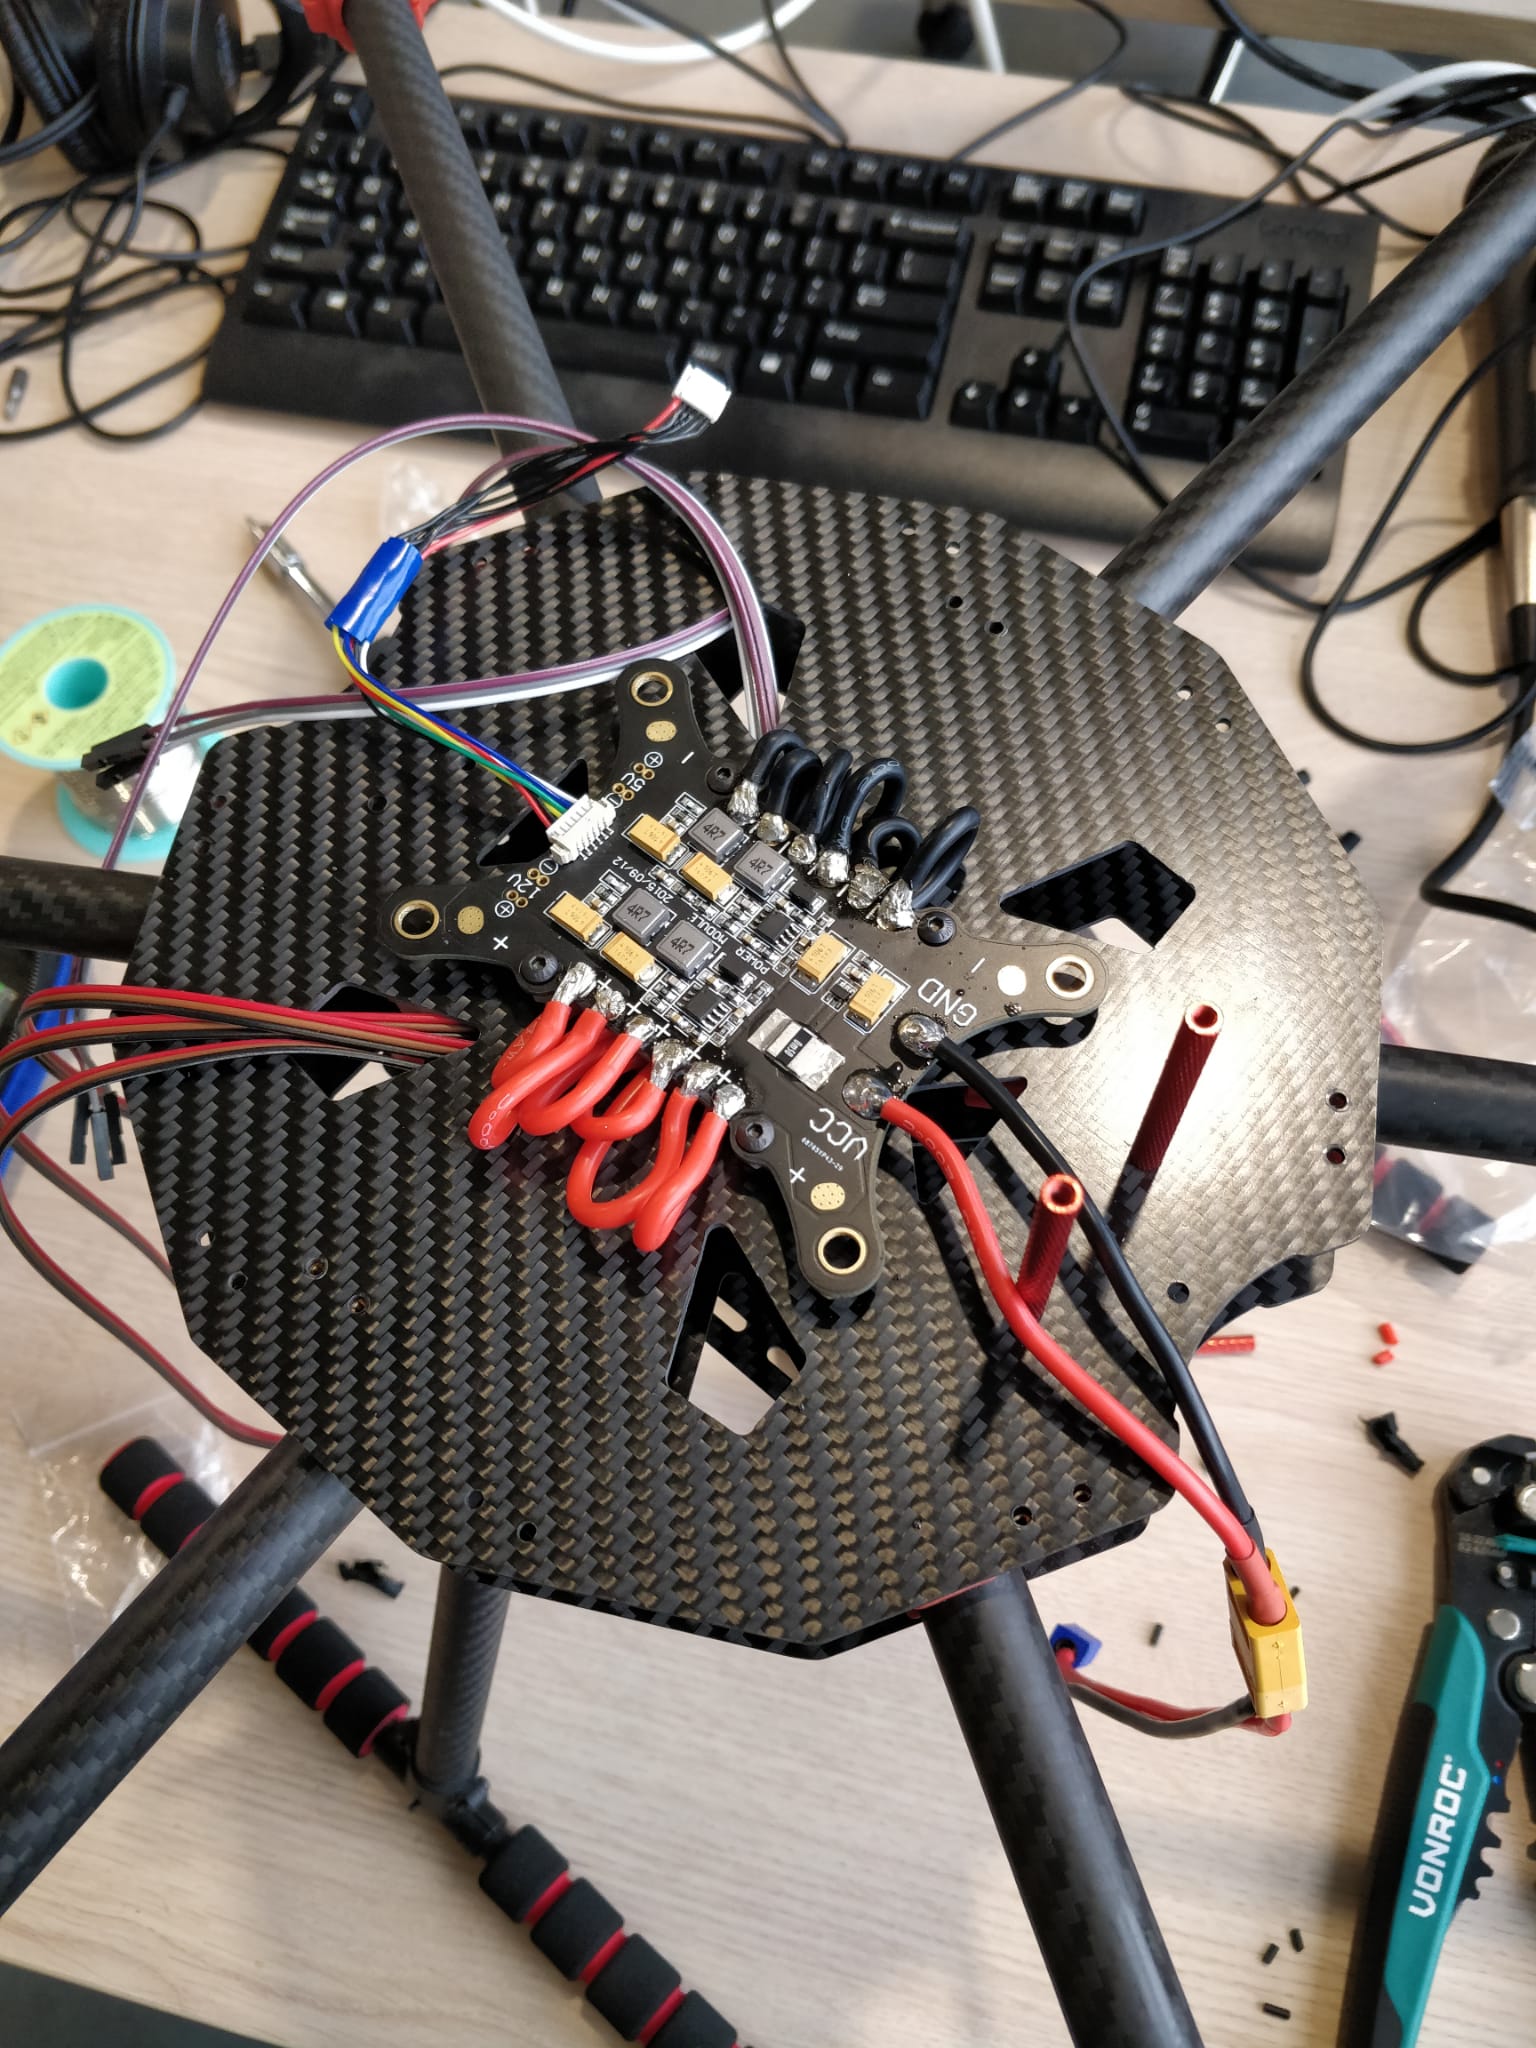
Het power board is hier en hier te vinden. De measurements van de pins zijn:
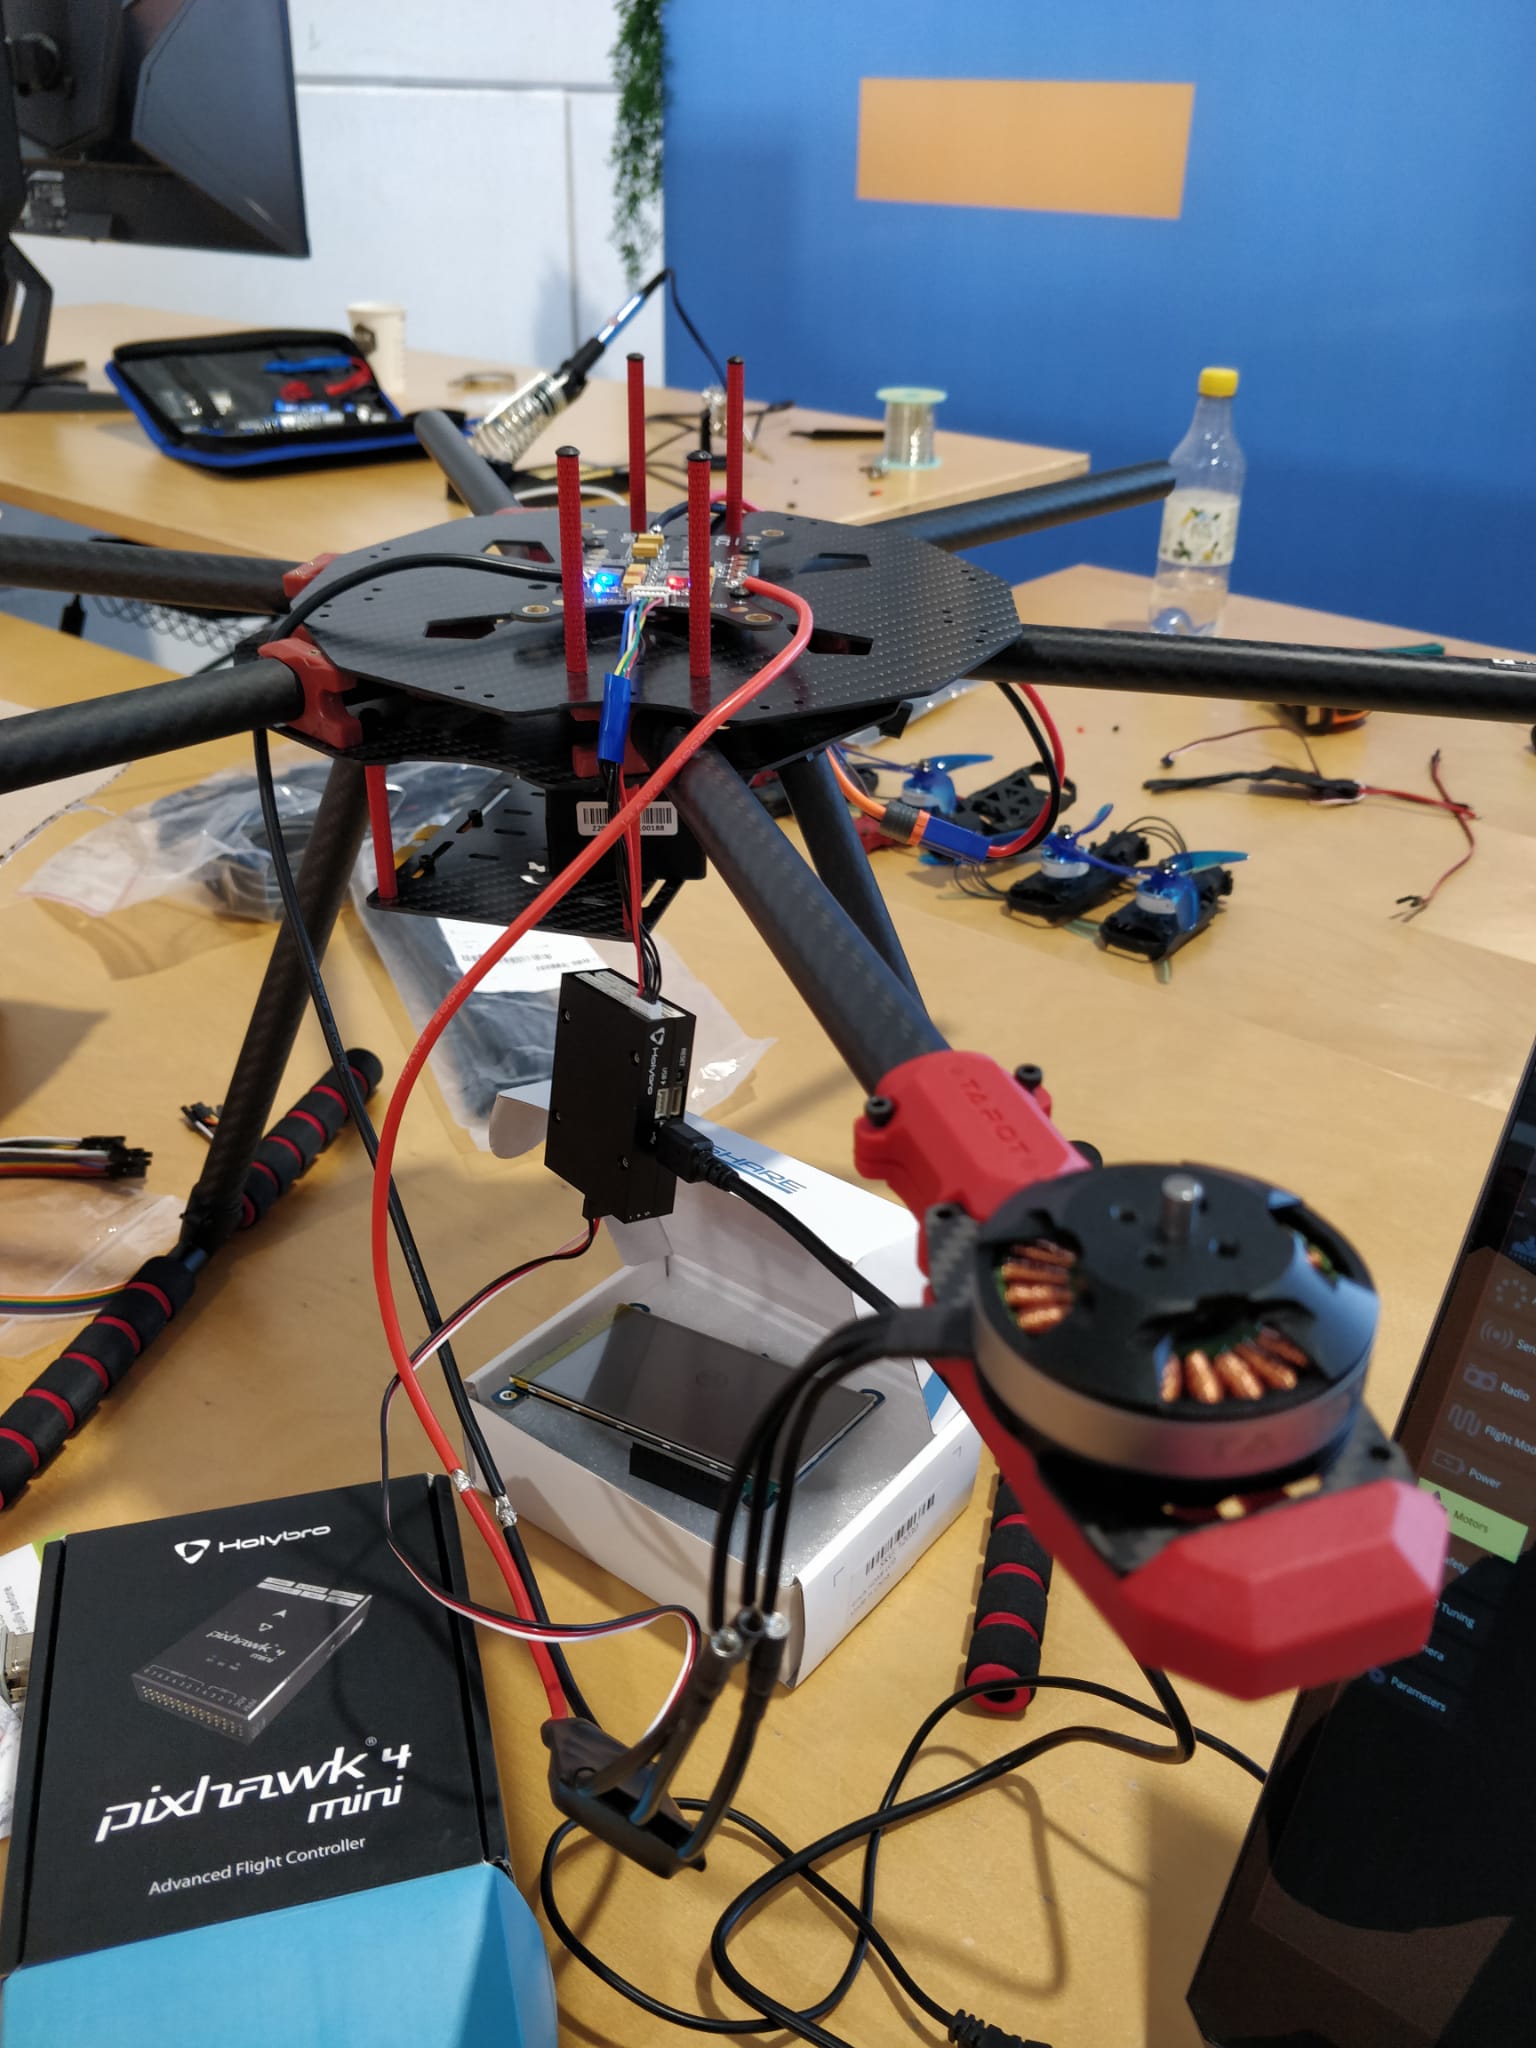
Connector is gesoldeerd van het PDB naar de pixhawk:
Battery info is zichtbaar in QGroundControl:

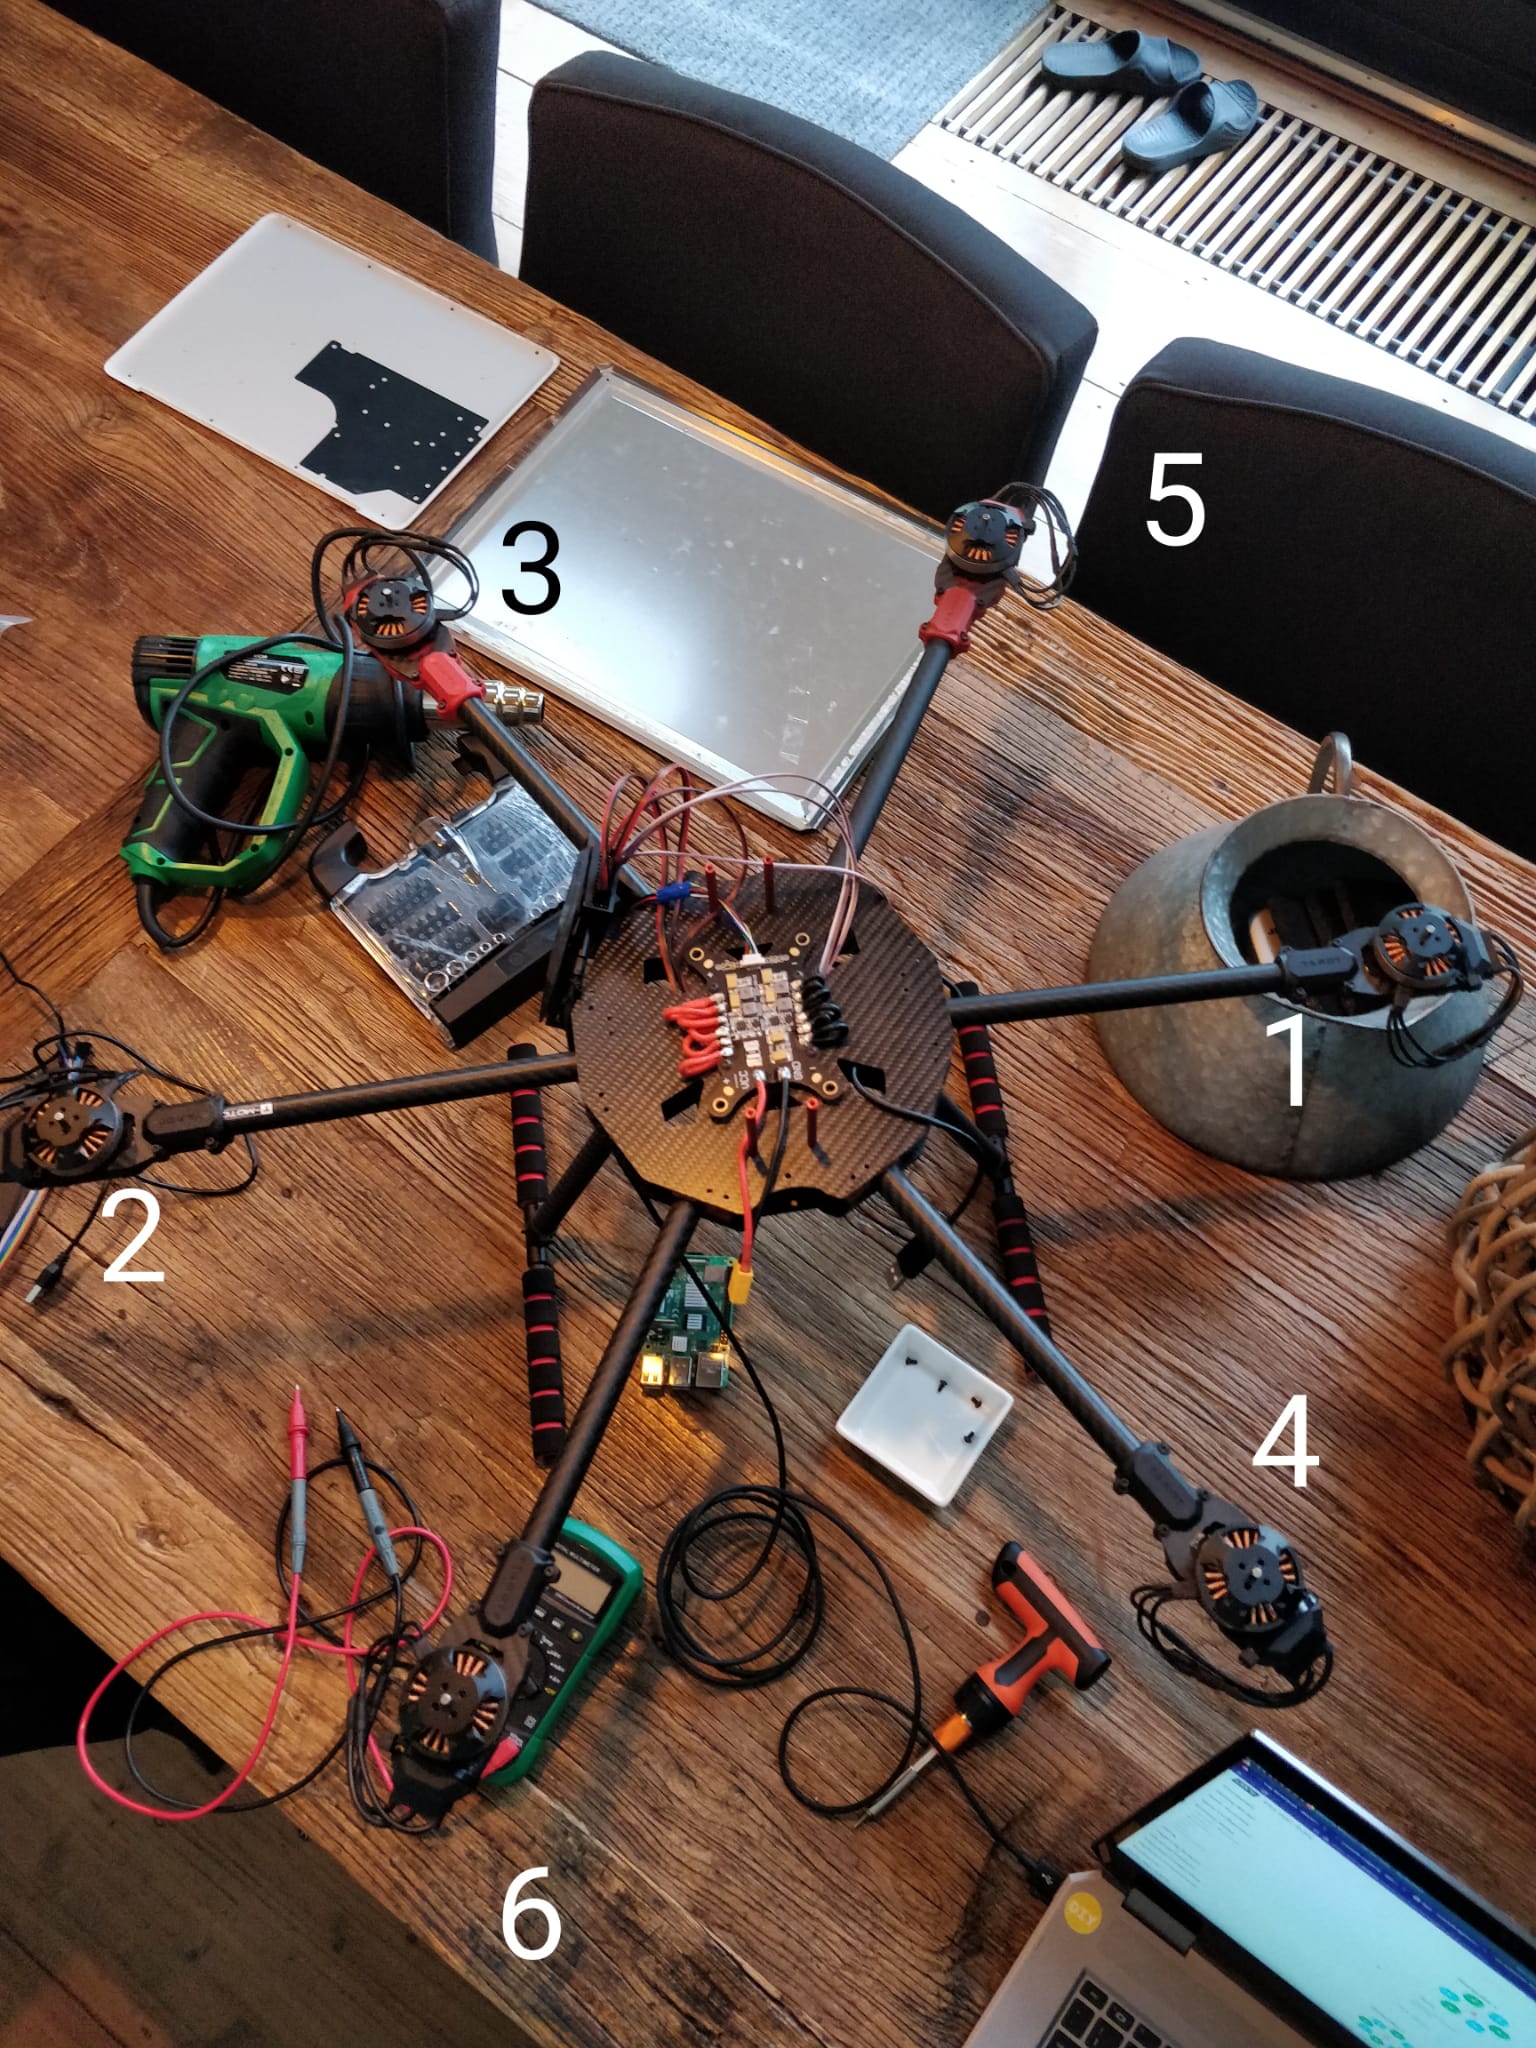
Testing the motors
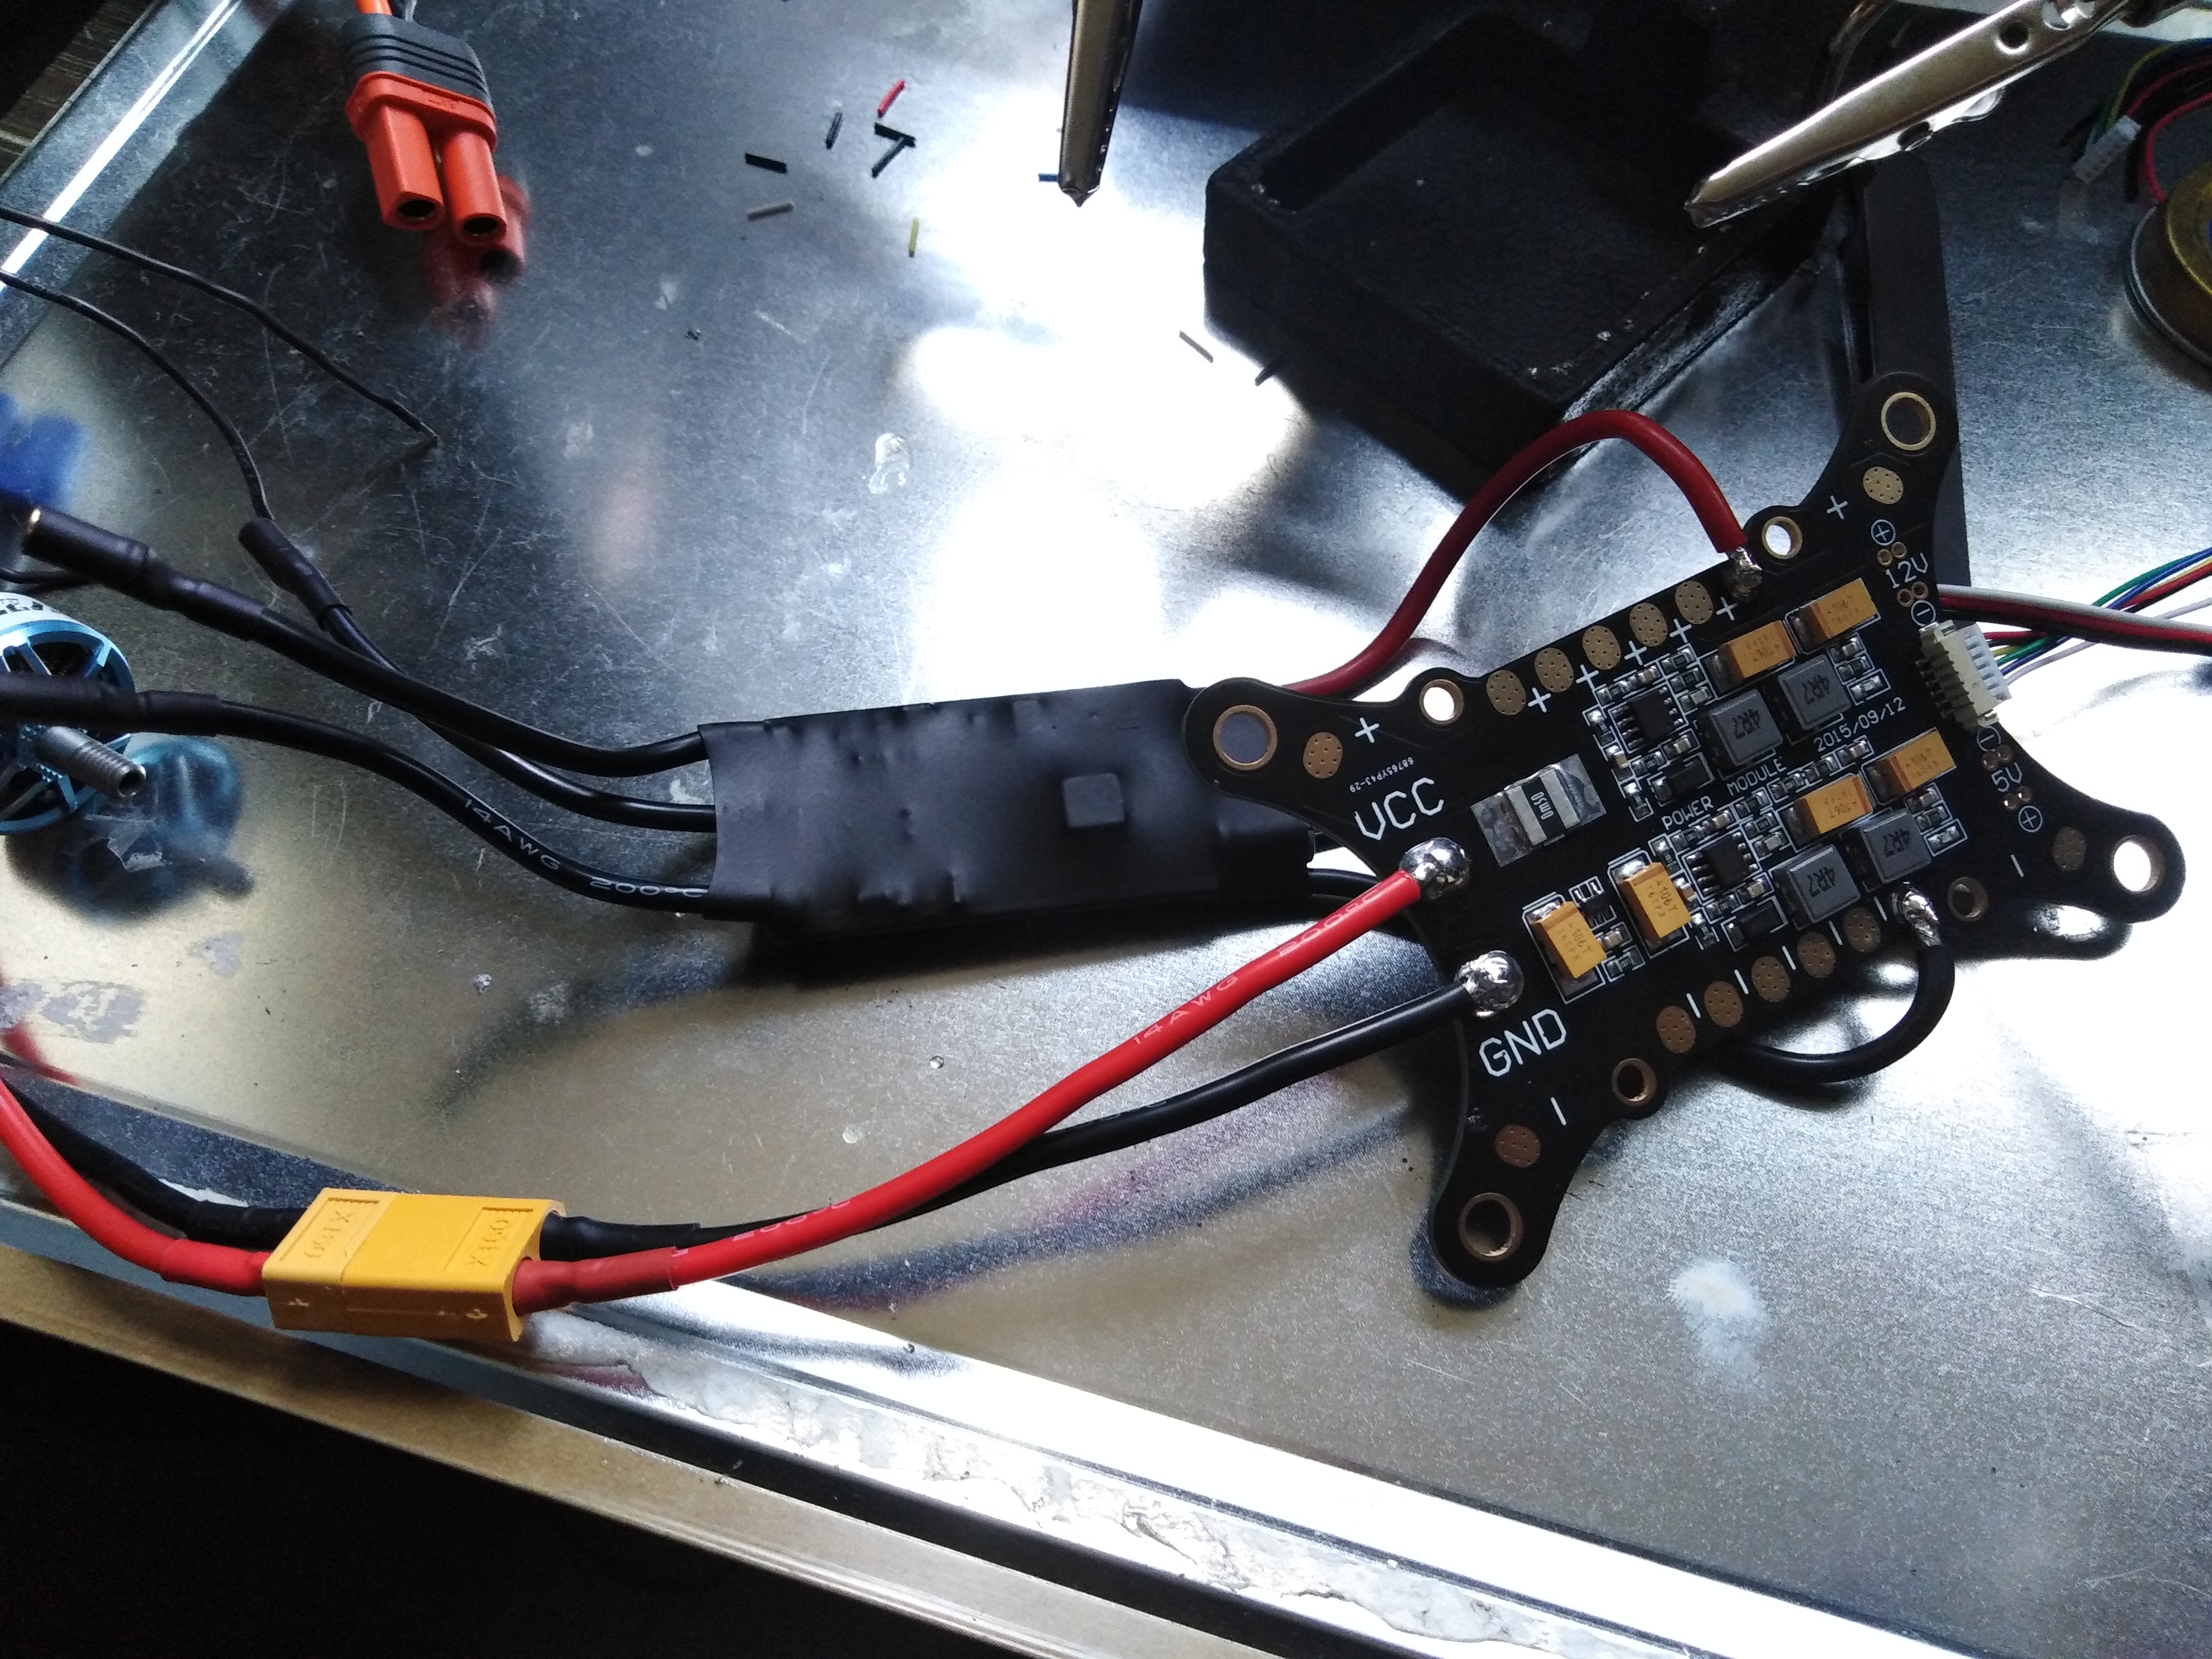
ESC aan PDB gesoldeerd en motor daaraan vast gemaakt:
Motor proberen aan te sturen met QGroundControl door motor sliders aan te passen, motor draait maar vanaf niks naar heel snel. Waarschijnljik moeten de batterij parameters goed gezet worden
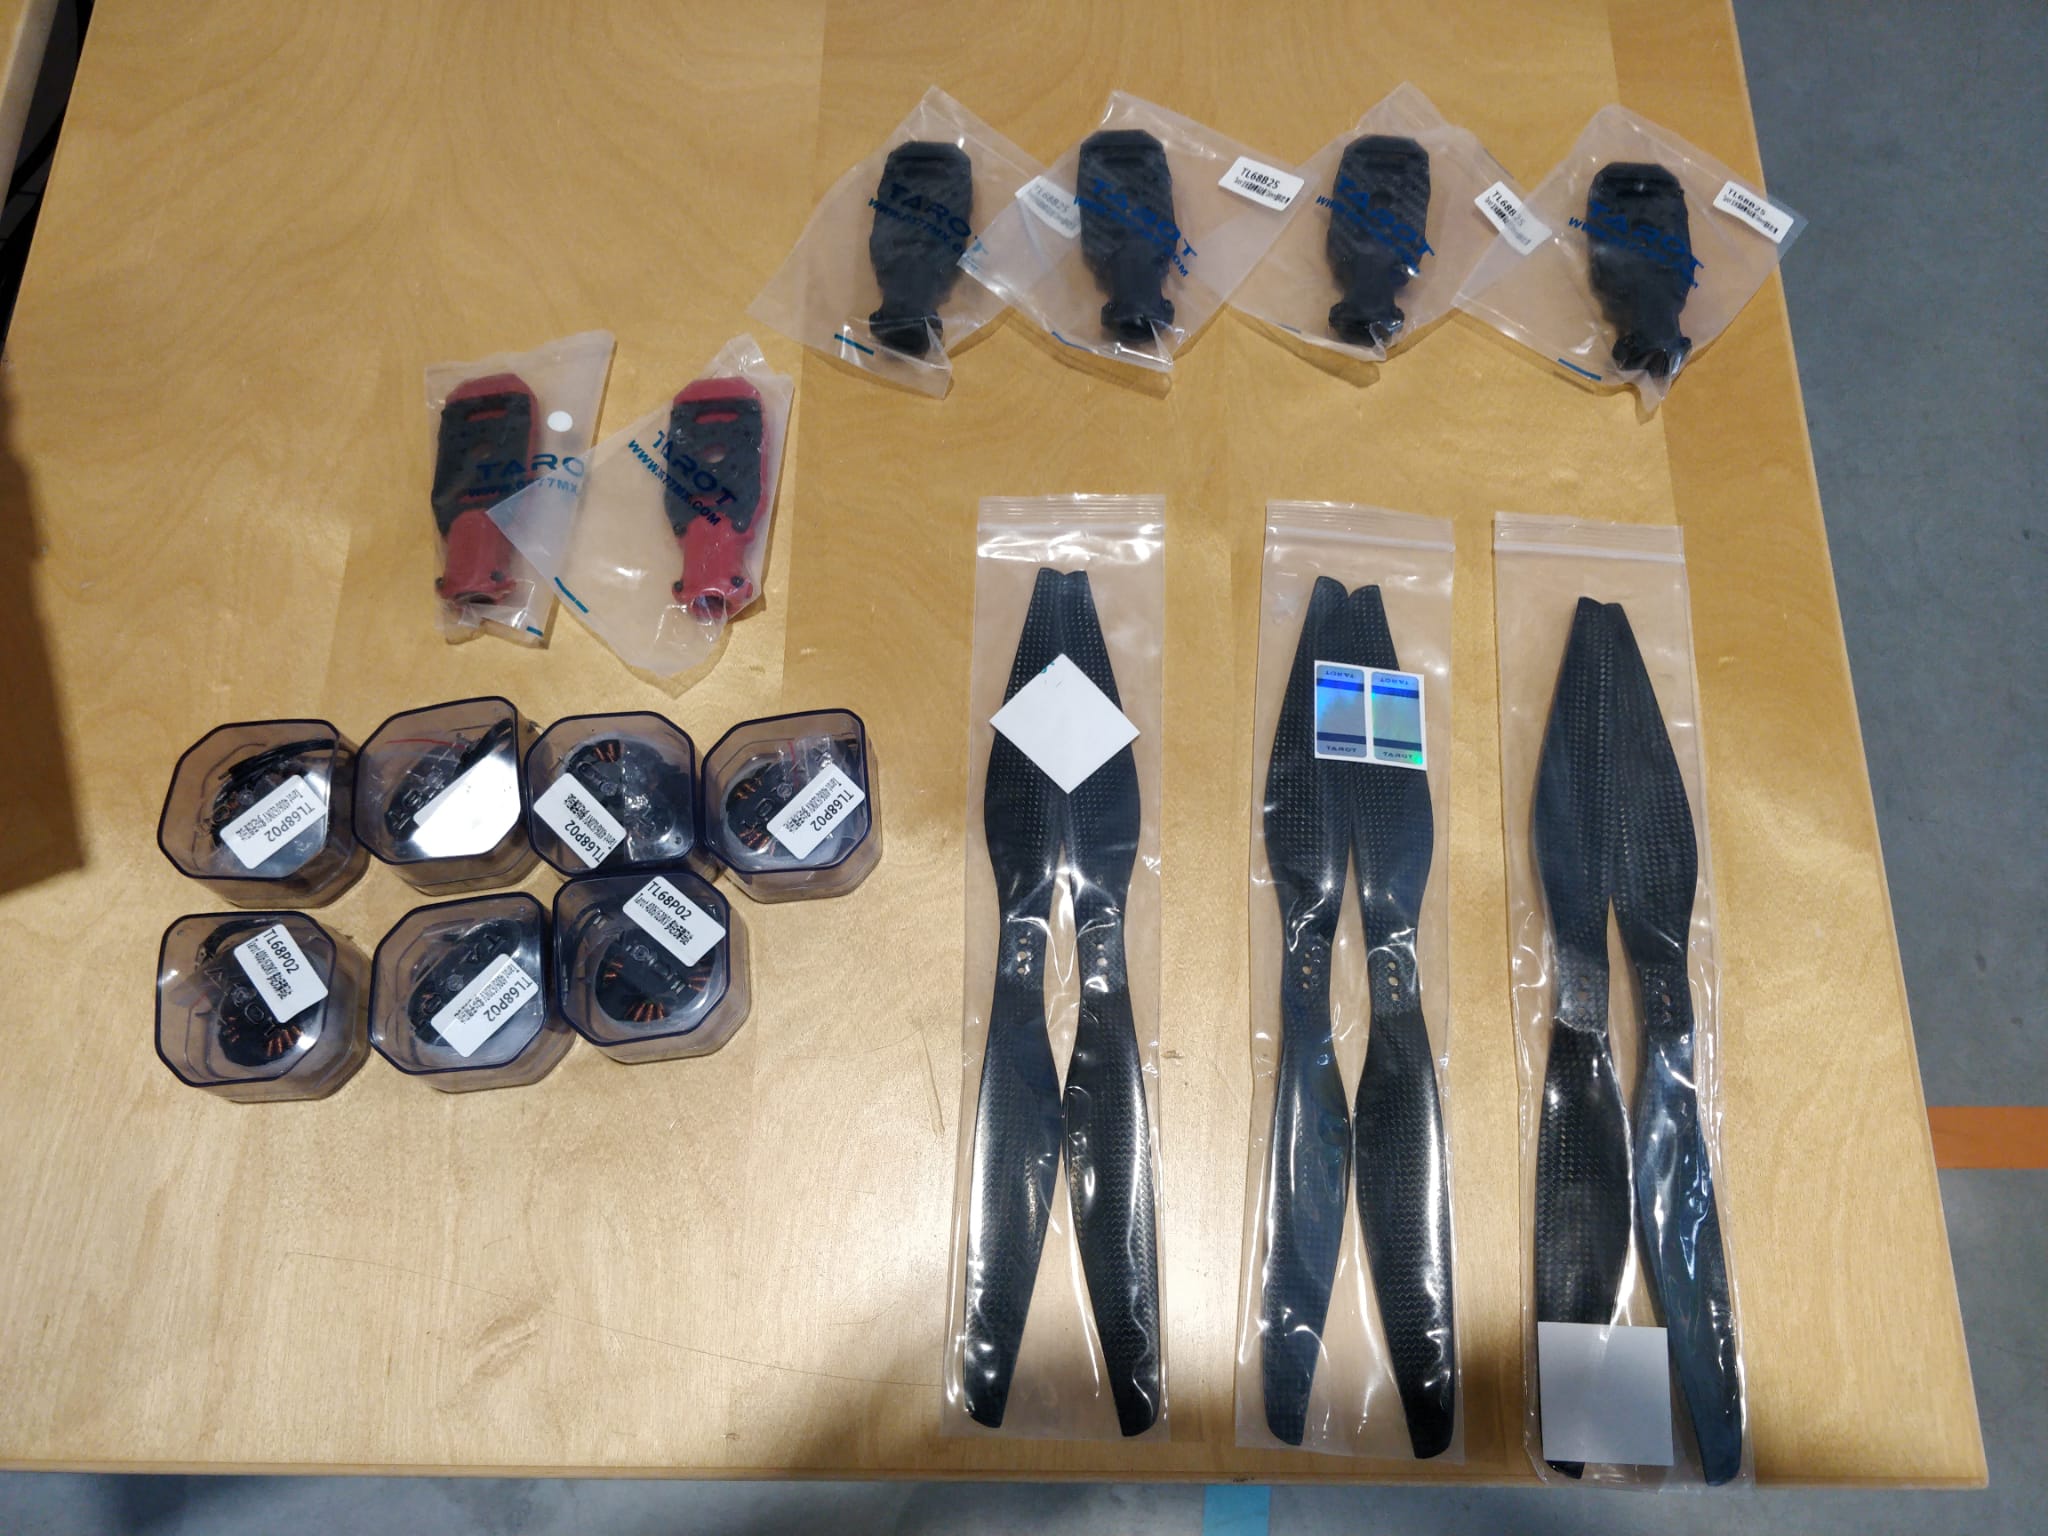
New motors and props
New motors and props arrived:
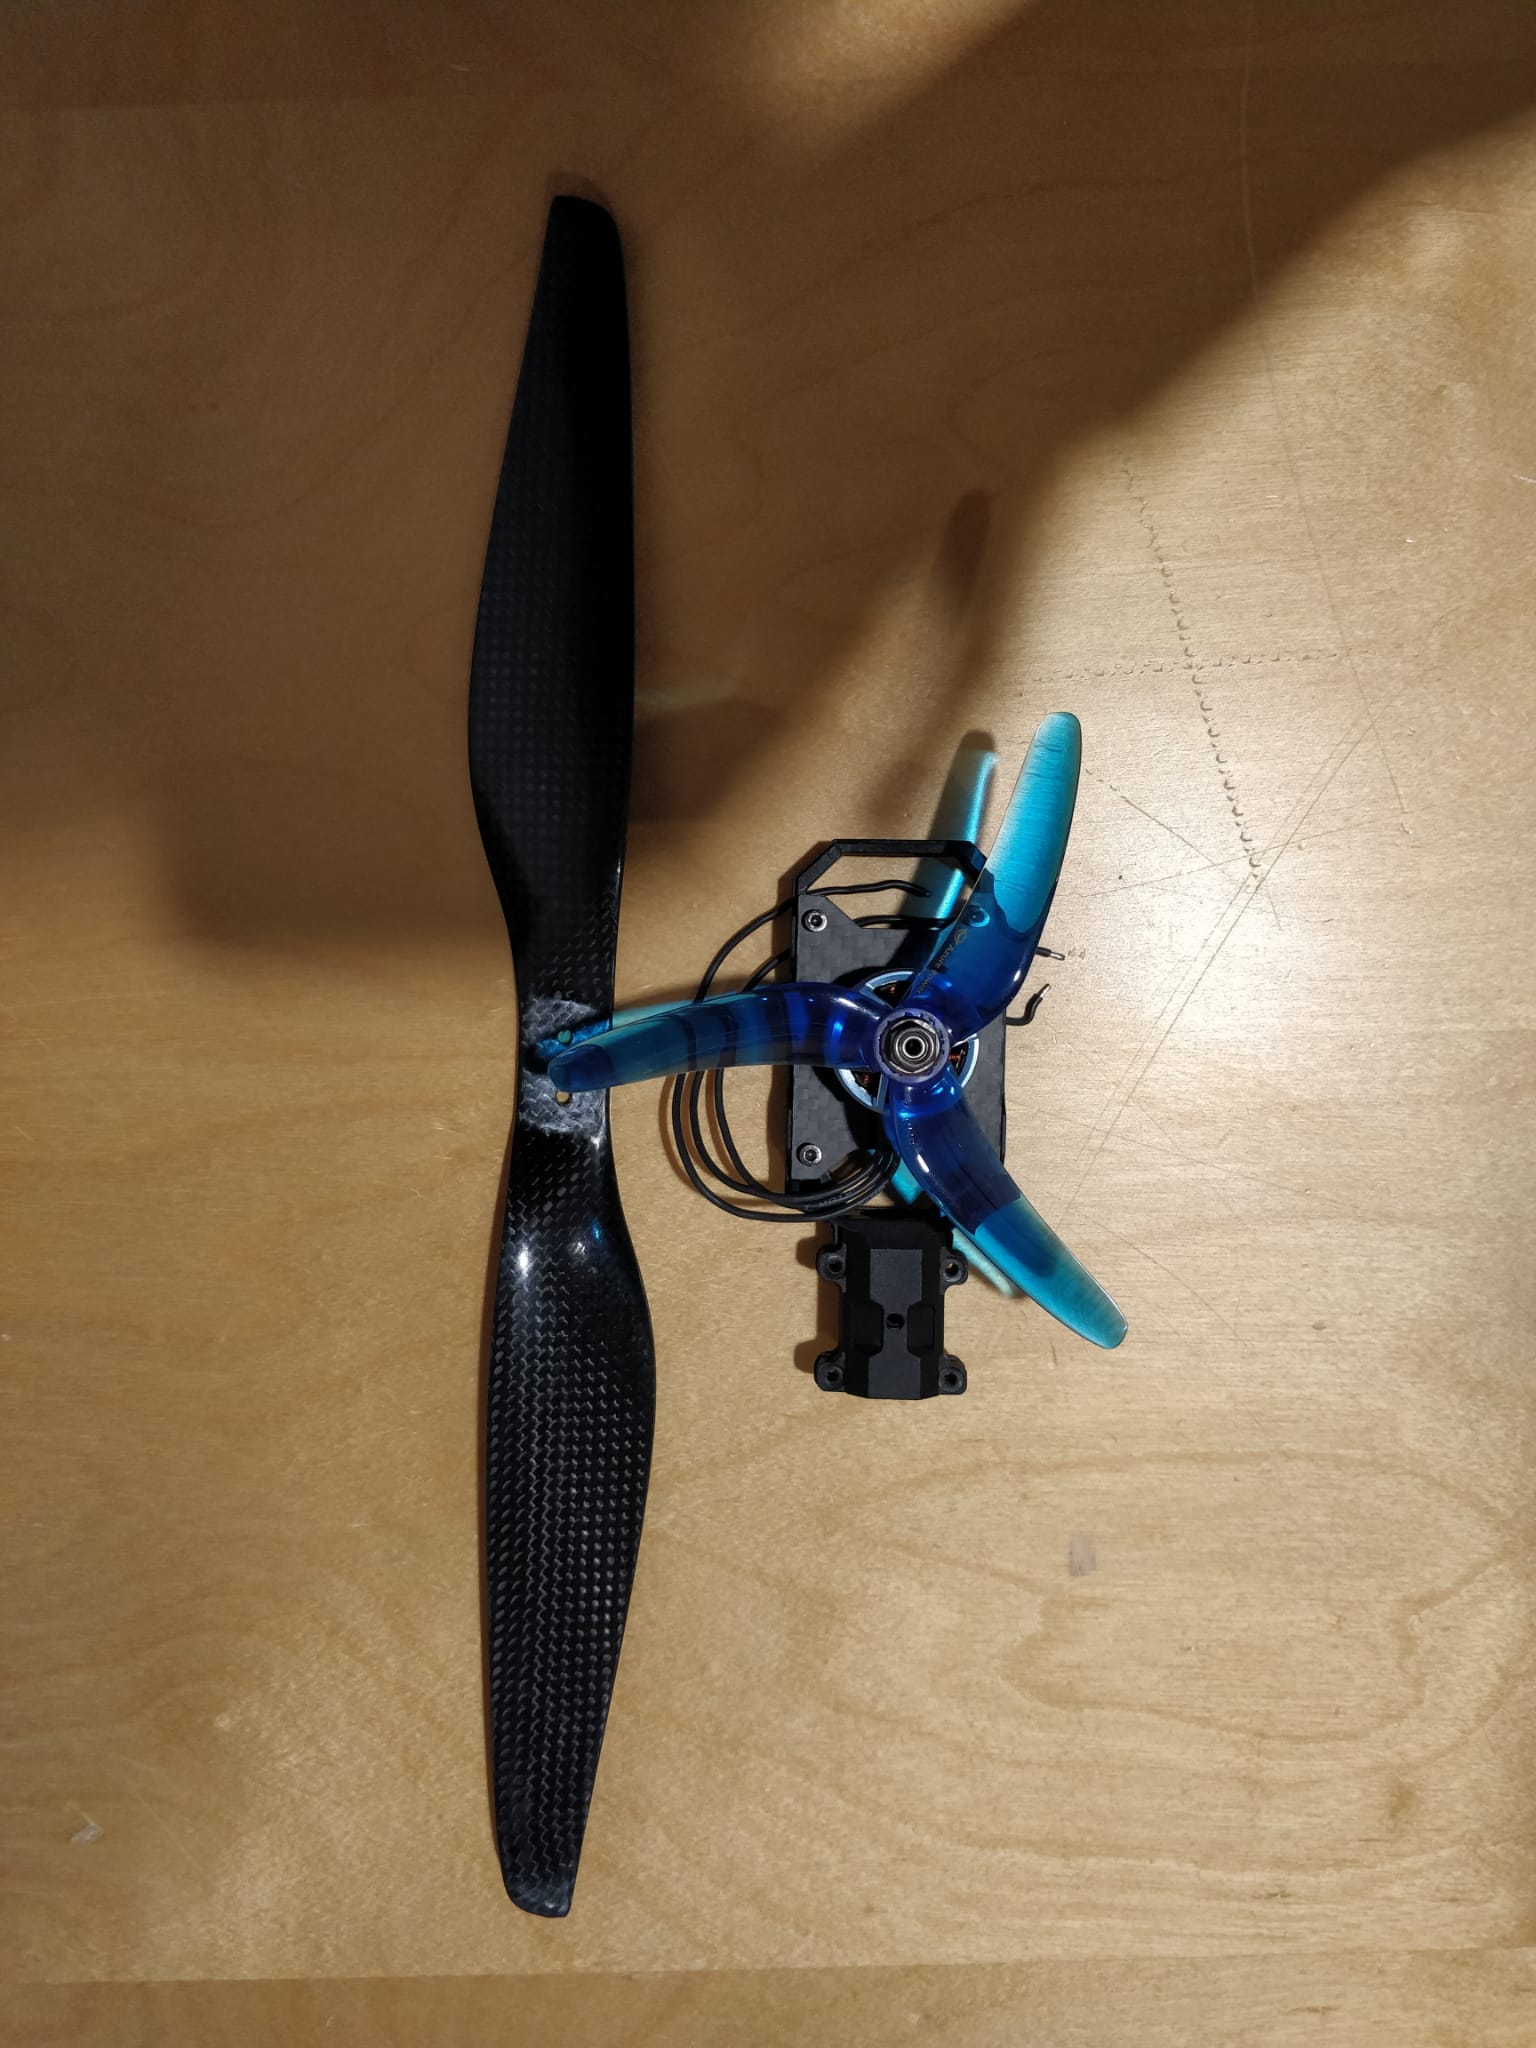
Compared to old motors and props:
how they look with 1 motor on drone:
I tested them with 1 ESC connected:
Testing 1 motor with GQC:
Building the motors onto the frame
I used heatshrink to connect the motors to the ESCs and make the cables to the PDB longer:
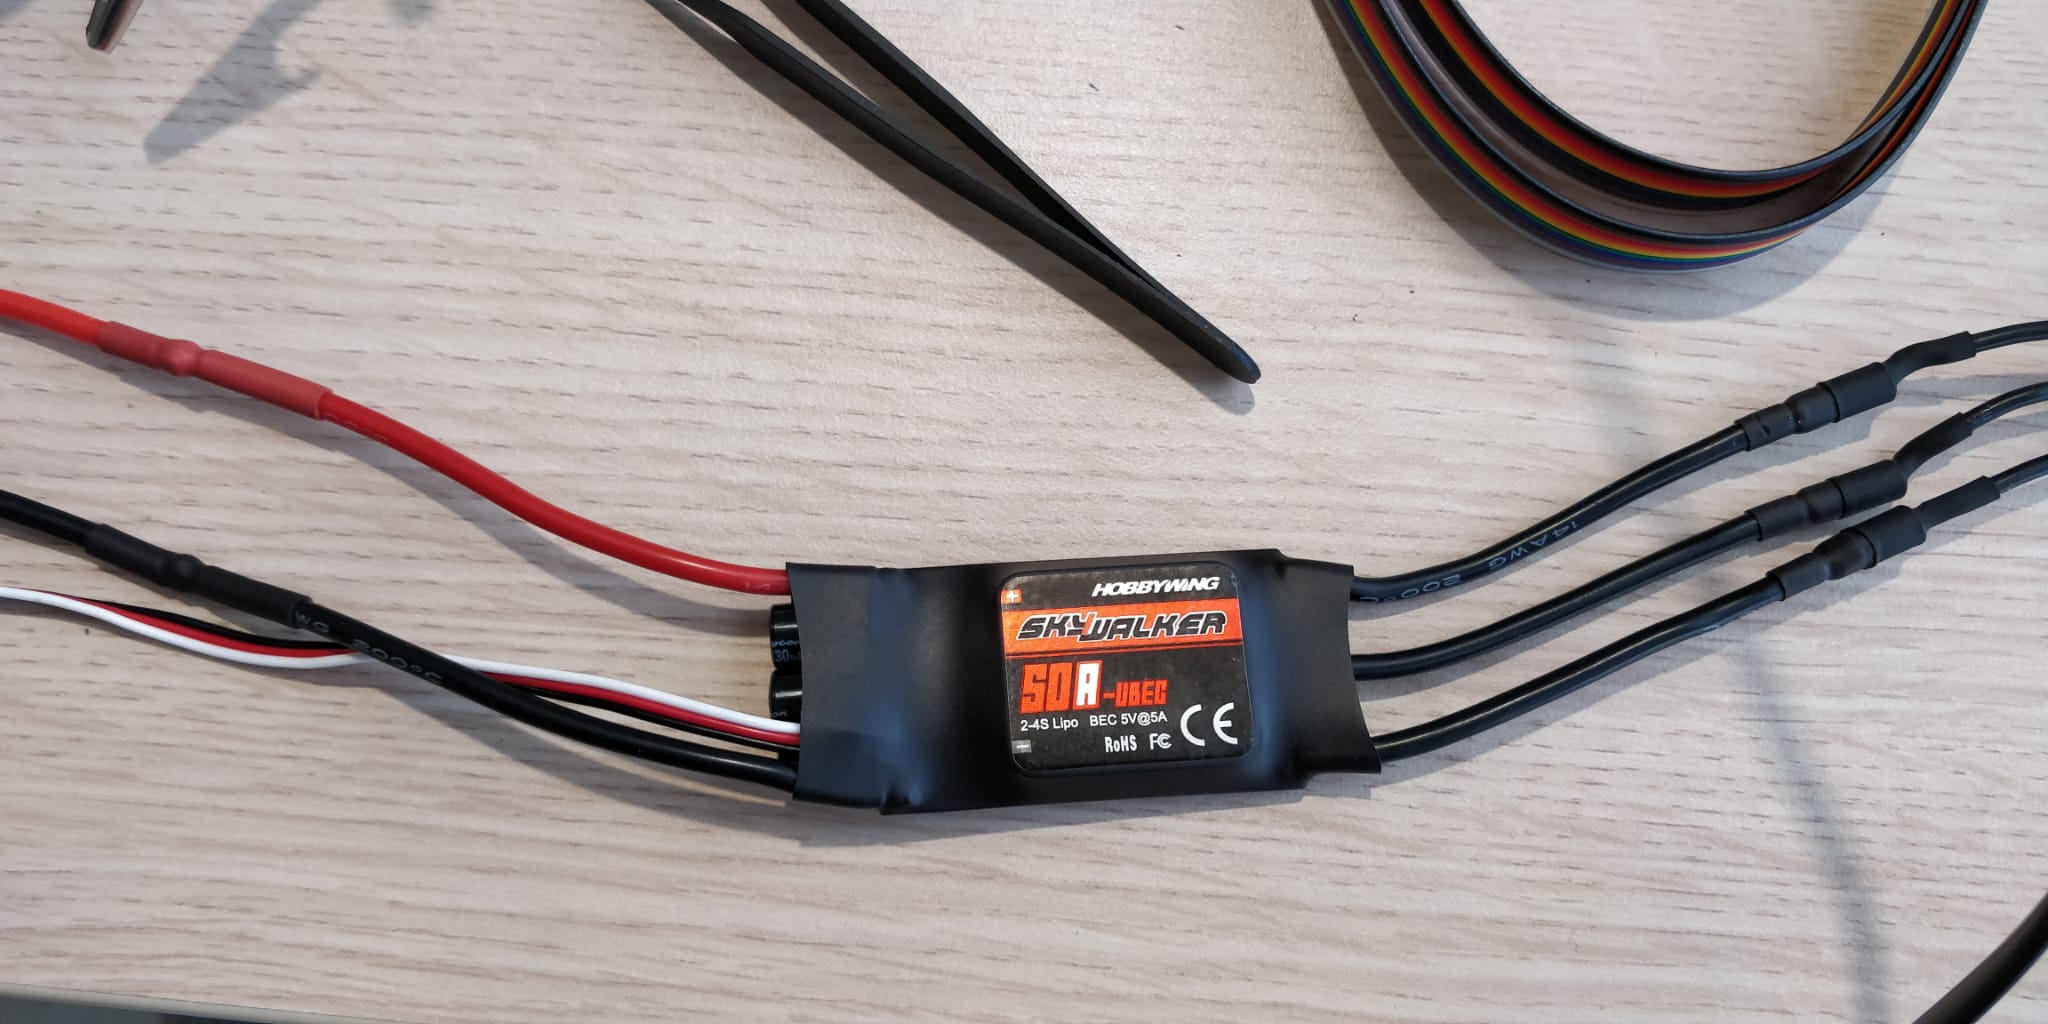
For the PWM connection with the brown-red-black cable, the only difference is that the white cable connects to the white cable. The red and black cables connect to red and black ones.Connection from ESC PWM cable to white-gray-purple cable:
I then soldered all motors to the PDB:
Motor numberings and how they are connected to the pixhawk:
Testing all motors from QGC:
However, testing all motors simultaneously from QGC didn't work, and I got a few errors. I then tried it from the MAVLink console with the command motor_test test -p 1 -t 4 to run all motors at 1% power for 4 seconds, and that worked:
First flight
04-05-23: When trying to run keyboard listener on rpi:
ubuntu@ubuntu:~/ros2_ws$ ros2 run test_controls test_controller
Traceback (most recent call last):
  File "/home/ubuntu/ros2_ws/install/test_controls/lib/test_controls/test_controller", line 33, in <module>
    sys.exit(load_entry_point('test-controls==0.0.0', 'console_scripts', 'test_controller')())
  File "/home/ubuntu/ros2_ws/install/test_controls/lib/test_controls/test_controller", line 25, in importlib_load_entry_point
    return next(matches).load()
  File "/usr/lib/python3.8/importlib/metadata.py", line 77, in load
    module = import_module(match.group('module'))
  File "/usr/lib/python3.8/importlib/__init__.py", line 127, in import_module
    return _bootstrap._gcd_import(name[level:], package, level)
  File "<frozen importlib._bootstrap>", line 1014, in _gcd_import
  File "<frozen importlib._bootstrap>", line 991, in _find_and_load
  File "<frozen importlib._bootstrap>", line 975, in _find_and_load_unlocked
  File "<frozen importlib._bootstrap>", line 671, in _load_unlocked
  File "<frozen importlib._bootstrap_external>", line 848, in exec_module
  File "<frozen importlib._bootstrap>", line 219, in _call_with_frames_removed
  File "/home/ubuntu/ros2_ws/install/test_controls/lib/python3.8/site-packages/test_controls/test_controller.py", line 11, in <module>
    from pynput.keyboard import Key
  File "/home/ubuntu/.local/lib/python3.8/site-packages/pynput/__init__.py", line 40, in <module>
    from . import keyboard
  File "/home/ubuntu/.local/lib/python3.8/site-packages/pynput/keyboard/__init__.py", line 31, in <module>
    backend = backend(__name__)
  File "/home/ubuntu/.local/lib/python3.8/site-packages/pynput/_util/__init__.py", line 76, in backend
    raise ImportError('this platform is not supported: {}'.format(
ImportError: this platform is not supported: ('failed to acquire X connection: Can\'t connect to display ":0": [Errno 111] Connection refused', DisplayConnectionError(':0', '[Errno 111] Connection refused'))

Try one of the following resolutions:

 * Please make sure that you have an X server running, and that the DISPLAY environment variable is set correctly
Tried setting display from this link. That didn't work. I tried a possible solution using sshkeyboard, which worked.
1e vlucht
Niet gelukt, sommige motoren draaiden niet.
ben erachter gekomen dat de CCW motoren anders gesoldeerd moeten worden (de 2 buitenste draden moeten omgewisseld worden) om de ook echt CCW te laten draaien
stickers geplakt op de armen van de CW motoren
welke direction moeten de motoren spinnen: VIDEO
installing props: VIDEO